Sete Orthopedic Implants
Understanding how are orthopedic implants inserted begins with the patient, not the device. Surgeons first review symptoms, imaging, bone quality, medical history, and daily movement. A knee implant may look small on an X-ray. Inside the operating room, however, every millimeter matters.
Orthopedic surgeon Dr. Daniel J. Berry has emphasized, “The right implant must be matched to the right patient.” This principle guides implant selection, surgical planning, and discussions about realistic recovery. The team marks the operative site, prepares sterile instruments, and uses anesthesia to control pain. The surgeon then exposes the damaged joint, removes carefully measured amounts of bone, and shapes the remaining surfaces. Trial components help test alignment, stability, and movement before the final implant is fixed.
Fit matters most.
The answer to “How are orthopedic implants inserted” depends on the joint and implant design. Hip replacements may use press-fit fixation or bone cement. Knee replacements commonly involve precise bone cuts, ligament balancing, and cemented components. Spinal implants require different access routes and neurological precautions. Computer navigation or robotic assistance may improve planning, but these tools do not replace surgical judgment.
Recovery is not automatic. Swelling, weakness, stiffness, and uncertainty can remain for weeks. Even well-planned surgery can face complications, including infection, loosening, blood clots, or limited motion. That uncomfortable reality deserves attention. Patients should ask how the implant will be fixed, what movement is expected, and which warning signs require medical advice. The safest explanation is specific, balanced, and tailored to the individual.
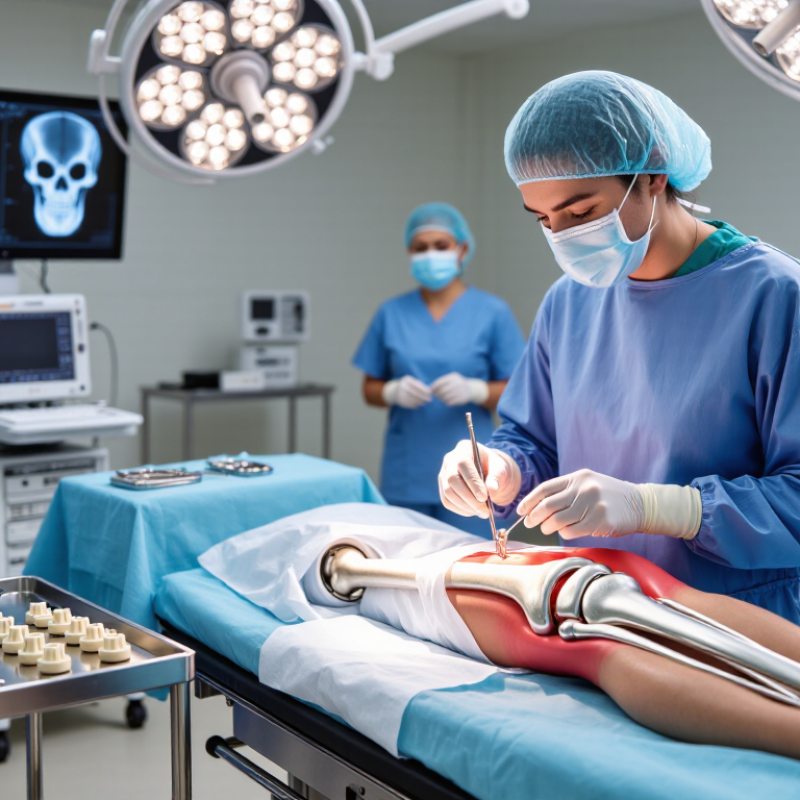
Orthopedic implants are medical devices placed inside the body to restore movement, replace damaged structures, or support healing. Common examples include joint replacements, bone plates, screws, rods, and spinal cages. Each implant has a specific job. A hip implant replaces worn joint surfaces. A plate holds a broken bone in alignment. A spinal cage helps maintain space between vertebrae.
Design matters because the body is active, heavy, and unpredictable. Implants may use titanium, cobalt-chromium alloys, stainless steel, ceramics, or advanced polymers. Engineers consider strength, weight, friction, corrosion, and tissue compatibility. The World Health Organization reports that musculoskeletal conditions affect about 1.71 billion people worldwide. The National Joint Registry’s 2023 report recorded more than three million hip and knee procedures in England and Wales since 2003. These figures show the growing need for reliable reconstruction. Still, an implant is not a lifetime guarantee. Wear, loosening, infection, or changing bone quality can affect results. Surgical planning helps, but real bodies rarely follow perfect diagrams.
Tips: Ask what the implant is designed to replace, support, or protect. Discuss expected lifespan, activity limits, recovery milestones, and warning signs. Confirm which professional society or registry supports the outcome data. Keep imaging and surgical records. Small details can matter later. You should also question unclear claims. Better information usually leads to better decisions.
Representative elastic modulus values show why implant materials are selected to provide fixation, load support, or spinal stability.
Implants stabilize fractures, replace damaged joint surfaces, restore alignment, or support the spine while bone and soft tissues heal.
Depending on the procedure, surgeons use screws, plates, rods, nails, anchors, cages, or joint components through an open or minimally invasive approach.
Elastic modulus describes resistance to deformation. The values shown are representative approximations and vary with material grade, design, and test conditions.
Approximate elastic modulus values: cortical bone 17 GPa, PEEK 3.6 GPa, titanium alloy 110 GPa, 316L stainless steel 193 GPa, and cobalt-chromium alloy 230 GPa.
Why and How Are Orthopedic Implants Inserted?
When Orthopedic Implantation Becomes Necessary
Orthopedic implantation may become necessary when damaged bone or a joint can no longer provide stable, useful movement. Severe fractures, advanced joint degeneration, spinal instability, and failed bone healing are common reasons. The decision usually follows months of pain, weakness, or restricted daily activity, not one uncomfortable afternoon.
Pain alone is not enough. An orthopedic specialist reviews physical findings, X-rays, CT scans, or MRI results. They also consider age, bone quality, medical conditions, activity level, and expected recovery. Non-surgical treatment may include medication, physical therapy, braces, or activity changes. Sometimes it works. Sometimes it only delays a difficult decision.
The procedure depends on the implant’s purpose. In fracture repair, screws, plates, rods, or wires hold bone fragments in alignment while healing occurs. During joint replacement, damaged surfaces are removed and replaced with artificial components. Surgeons plan the approach carefully, protect nearby nerves and blood vessels, and check stability before closing the incision.
Preparation matters. A patient may need blood tests, medication adjustments, dental evaluation, or smoking cessation. Recovery can involve wound care, walking aids, exercises, and scheduled imaging. Complications may include infection, blood clots, stiffness, loosening, or persistent pain. Results are not guaranteed.
The choice can feel uncertain. That is normal. A second orthopedic opinion may clarify whether implantation is truly necessary, which risks are personal, and what recovery will demand.
Before an orthopedic implant is inserted, careful planning often matters as much as the operation itself. The surgeon reviews X-rays, CT scans, medical history, medications, allergies, and daily activity. These details help determine implant size, surgical approach, and expected support. A knee replacement, for example, requires attention to alignment, bone quality, and ligament balance. The plan is specific, but never fixed. Swelling, damaged bone, or an unexpected finding may require adjustment during surgery. That uncertainty deserves honest discussion.
Preparation also includes practical steps. Patients may need blood tests, infection screening, medication changes, and guidance about fasting. A physical therapist can teach exercises before surgery. Stronger muscles may support safer movement afterward. The care team should explain anesthesia, pain control, wound care, walking aids, and warning signs. Patients should report fever, skin infections, dental concerns, or new medicines. Small details can influence timing. Clinicians often see unclear instructions create avoidable anxiety, even when the medical plan is sound.
Tips: Bring an updated medication list and written questions. Arrange help with meals, transport, and bathing. Keep walking paths clear at home. Ask what happens if the planned implant or surgical route changes. Do not stop prescribed medicine without medical advice. Recovery is personal, and a neat schedule may still need revision.
| Planning or Preparation Stage | Typical Information Reviewed | Why It Matters | Common Decisions or Checks |
|---|---|---|---|
| 1. Confirm the Indication | Symptoms, physical examination, functional limitations, previous treatments, and the diagnosis | Implant surgery is considered when the expected benefits outweigh nonsurgical or less-invasive options. | Confirm the condition, severity, treatment goals, and whether surgery is appropriate. |
| 2. Review Medical History | Medications, allergies, previous operations, heart or lung disease, diabetes, smoking, and prior infections | Medical conditions and medicines can affect anesthesia, bleeding, wound healing, and infection risk. | Optimize health conditions and create a safe plan for medicines that influence bleeding or healing. |
| 3. Perform Imaging and Measurements | Weight-bearing or standard radiographs; advanced imaging when anatomy, bone loss, or soft tissues require further assessment | Imaging shows bone shape, alignment, joint damage, fractures, deformity, and the amount of usable bone. | Estimate implant size, position, alignment, fixation strategy, and the need for additional components. |
| 4. Assess Bone Quality | Bone density, cortical support, bone defects, osteoporosis risk, and previous hardware or surgery | The strength and shape of the bone influence whether the implant can be stabilized immediately. | Choose an appropriate fixation concept, such as press-fit fixation, cemented fixation, screws, plates, or supplemental fixation. |
| 5. Evaluate Soft Tissues and Function | Muscle strength, ligament stability, skin condition, range of motion, gait, and limb alignment | Soft-tissue balance and joint stability are important for movement, implant loading, and recovery. | Plan the surgical approach, correction of deformity, soft-tissue balancing, and postoperative restrictions. |
| 6. Screen for Infection | Medical history, skin examination, dental or urinary concerns when clinically relevant, and laboratory tests when indicated | An infection near an implant can threaten wound healing and implant function. | Treat active infections and postpone elective implantation when clinically necessary. |
| 7. Select Implant Design and Size | Anatomy, activity level, bone quality, joint stability, fixation needs, and imaging-based templating | Implants are available in different shapes, sizes, fixation methods, and motion or stability options. | Prepare a primary implant plan and compatible backup sizes or components before surgery. |
| 8. Plan Anesthesia and Blood Management | Overall health, airway assessment, laboratory results, anemia status, and expected surgical complexity | Anesthesia and blood-loss planning support patient safety during and after implantation. | Select an anesthesia approach, address anemia when possible, and plan blood-conservation measures if appropriate. |
| 9. Prepare the Patient | Preoperative instructions, skin preparation, nutrition, smoking status, home support, and rehabilitation expectations | Preparation can reduce avoidable risks and helps the patient participate in recovery. | Give instructions about fasting, medication use, mobility aids, wound care, exercise, and discharge planning. |
| 10. Plan the Surgical Approach | Target anatomy, prior scars, neurovascular structures, deformity, bone defects, and required exposure | The approach determines how the surgeon reaches the bone while protecting important tissues. | Choose the incision and exposure, identify structures to protect, and anticipate technical challenges. |
| 11. Insert and Stabilize the Implant | Prepared bone surfaces, trial components, alignment checks, joint stability, and range of motion | The implant must be positioned accurately and secured so that it can support normal or intended loads. | Prepare the bone, place the selected components, verify fit and alignment, and use the planned fixation method. |
| 12. Verify the Result | Intraoperative examination, measurements, imaging when used, implant tracking, and wound assessment | Final checks help identify malalignment, instability, unexpected fracture, or other technical concerns before closure. | Confirm component position, stability, limb or joint alignment, soft-tissue tension, and correct documentation. |
| 13. Plan Recovery and Follow-Up | Weight-bearing instructions, physical therapy, thrombosis prevention, pain control, wound care, and follow-up imaging | Recovery protocols protect the surgical repair while restoring strength, movement, and function. | Set activity limits, rehabilitation milestones, warning signs, and follow-up appointments based on the procedure and patient factors. |
Note: Implant selection, fixation, anesthesia, testing, and rehabilitation vary according to the affected joint or bone, patient health, anatomy, surgical technique, and local clinical protocols.
Why and How Are Orthopedic Implants Inserted?
How Orthopedic Implants Are Inserted Step by Step
Orthopedic implants help restore stability, alignment, or movement after injury or joint damage. The surgeon first reviews medical history, scans, medications, and bone quality. This planning helps determine the implant’s size, position, and surgical approach. However, no plan is perfect. Unexpected bone weakness or tissue damage can change the procedure.
On surgery day, the patient receives anesthesia and is positioned securely. The surgical team cleans the skin and maintains a sterile field. The surgeon makes a controlled incision near the damaged area. Nearby muscles, tendons, and nerves are carefully protected. Damaged bone or cartilage is removed with measured instruments. The bone surfaces are then shaped to accept the implant.
The implant is inserted and checked for stability, alignment, and movement. Some implants rely on a tight fit, while others use surgical fixation materials. Imaging may confirm the position before the incision is closed. The team controls bleeding and applies a sterile dressing. Afterward, nurses monitor circulation, pain, swelling, and early movement. Recovery often includes physical therapy and scheduled follow-up visits. Small details matter. Even a well-positioned implant may need adjustment if healing does not progress as expected.
After an orthopedic implant is inserted, recovery begins with careful observation, not immediate normal movement. Nurses check pain, swelling, circulation, sensation, and the surgical wound. A patient may use crutches, a walker, or a brace while tissues heal. Early movement is often encouraged, but the safe amount depends on the joint, implant, and surgeon’s plan.
Recovery rarely follows a neat calendar. Some patients regain strength quickly, while others experience stiffness, fatigue, or uneven progress. Physical therapy may include gentle bending, muscle activation, balance work, and supervised walking. Small details matter. A warm wound, increasing redness, drainage, fever, sudden calf pain, or new weakness should be reported promptly. Pain should gradually become more manageable, although discomfort can return after increased activity.
Follow-up appointments help clinicians assess healing and implant performance. They may examine movement, stability, walking patterns, and the skin around the incision. X-rays or other imaging can show alignment, bone healing, wear, or possible loosening. These checks may occur weeks after surgery and later at longer intervals. Patients should mention clicking, persistent swelling, reduced function, or pain that feels different. It is easy to blame every symptom on recovery, and that assumption can delay useful care. Keeping a simple record of pain, activity, medication effects, and daily function can make consultations more accurate.
Orthopedic implants restore movement, replace damaged structures, or support healing. Examples include joint replacements, plates, screws, rods, and spinal cages. Each device has a specific purpose. Plans can change.
Implants may use titanium, stainless steel, ceramics, special alloys, or advanced polymers. Engineers consider strength, weight, friction, corrosion, and tissue compatibility. No material works perfectly for every body.
The surgeon reviews medical history, scans, medicines, and bone quality. This information helps determine implant size, position, and surgical approach. Unexpected bone weakness can change the plan.
The patient receives anesthesia and is positioned securely. The team cleans the skin and protects nearby muscles, tendons, and nerves. Damaged bone or cartilage is shaped before insertion. The implant is then checked for stability and alignment.
The surgical team checks movement, stability, and alignment directly. Imaging may confirm the implant’s position before closing the incision. A good position helps, but it cannot guarantee perfect healing.
Nurses monitor pain, swelling, circulation, sensation, and the wound. Patients may use crutches, a walker, or a brace temporarily. Physical therapy can include gentle bending, balance work, and supervised walking. Progress is often uneven.
Report increasing redness, wound drainage, fever, new weakness, or sudden calf pain promptly. Also mention persistent swelling or pain that feels different. Do not dismiss every symptom as normal recovery.
Follow-up visits assess movement, stability, walking patterns, and incision condition. X-rays or other imaging may show bone healing, wear, alignment, or loosening. Keep records of pain, activity, medicines, and daily function. Small details matter later.
Orthopedic implants are medical devices placed inside the body to support, replace, or stabilize damaged bones and joints. They may help restore movement, maintain proper alignment, reinforce weakened structures, or encourage healing after injury or disease. Implantation becomes necessary when pain, instability, fractures, joint damage, or limited mobility cannot be adequately treated with medication, therapy, or other non-surgical approaches. Before surgery, doctors evaluate the patient’s health, review imaging results, select an appropriate implant, and create a precise surgical plan.
How are orthopedic implants inserted? During the operation, the surgical team prepares the affected area, makes a carefully planned incision, and exposes the damaged bone or joint. The surgeon removes or reshapes unhealthy tissue, positions the implant, and secures it using suitable fixation methods. The area is then checked for alignment, movement, and stability before the incision is closed. After surgery, patients follow a rehabilitation program, manage swelling and discomfort, and attend follow-up visits. Doctors use examinations and imaging to monitor healing, implant position, and long-term function.
